It was a hungover Saturday and I was craving some bread. Unfortunately in Korea you just can’t get good unsweetened bread without seeking out specialist bakeries and spending over the odds.
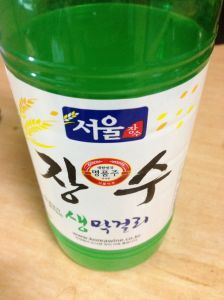
I had some flour and a bottle of makgeolli and I decided to put the urban myth to the test by using a bottle of makgeolli as a yeast substitute.
Now unfortunately I didn’t weigh any of the ingredients but it’s not a big deal as all you want is the right consistency.
Ingredients
Rye Flour
Plain Flour
Half a bottle of Makgeolli
Sesame Seeds (couple of tablespoons)
Black pepper
Olive oil
Pumpkin seeds (optional)
Method
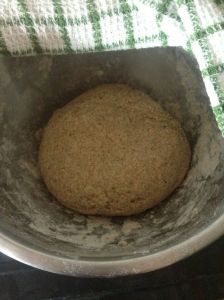
Firstly I used about 4 parts rye flour to 1 part plain flour (I did this to make the bread less dense). I mixed them in a bowl with a splash of salt and made a well in the centre. Gradually I poured in the makgeolli just stirring in the flour mixture gently trying to keep it as evenly mixed as possible. It’s always better to use less liquid initially as you can always add more. My loaf used just under half a bottle of makgeolli and it was a relatively small loaf.
You want the liquid to only just be able to absorb all the flour so it’s not runny or too sticky.
I then added a good few shakes of black pepper and a handful of sesame seeds, dusted my hands with flour and kneaded the mixture together into a ball and pressed down on it gently to flatten it a little. (At this point if you are a fan of pumpkin seeds then add them too – I was all out at the time).
I had nowhere particularly warm so I used the top of my toaster oven to set the bowl down and covered it with a tea towel for 40 minutes. I was impatient but the longer you leave it the better it should rise.
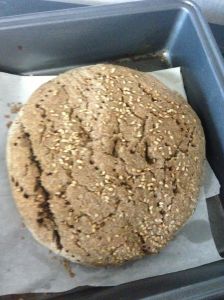
I put it in a baking dish on some baking paper and forked it a good few times on the surface. I spread about 2 teaspoons of olive oil over the top and sprinkled more sesame seeds over it.
I baked it at 180 degrees Celsius for about 45 minutes, checking it with a knife after 30 minutes. (Be aware that if you make a larger loaf than mine it will need longer. When the bread is done, the underneath should sound hollow when you tap it and the knife should come out clear when you stick it in and out of the bread).
I really did rush this as I was impatient. Although it tasted fine there is definitely room for improvement, modifications and more patience!
At least you now have the bones of the recipe and if anyone makes it please let me know how you get on.
Quick Tip* I have read that it is important to use “fresh makgeolli” that expires within a couple of weeks of purchase because the yeast is active in it. I think most makgeolli is of that variety so just check the sell-by before you pick it up.


